Configuring the labor price grid
The labor price grid provides the flexibility to set pricing by increments of hours. The
Once the labor price grid is set up, it can be used by the
Select Pricing
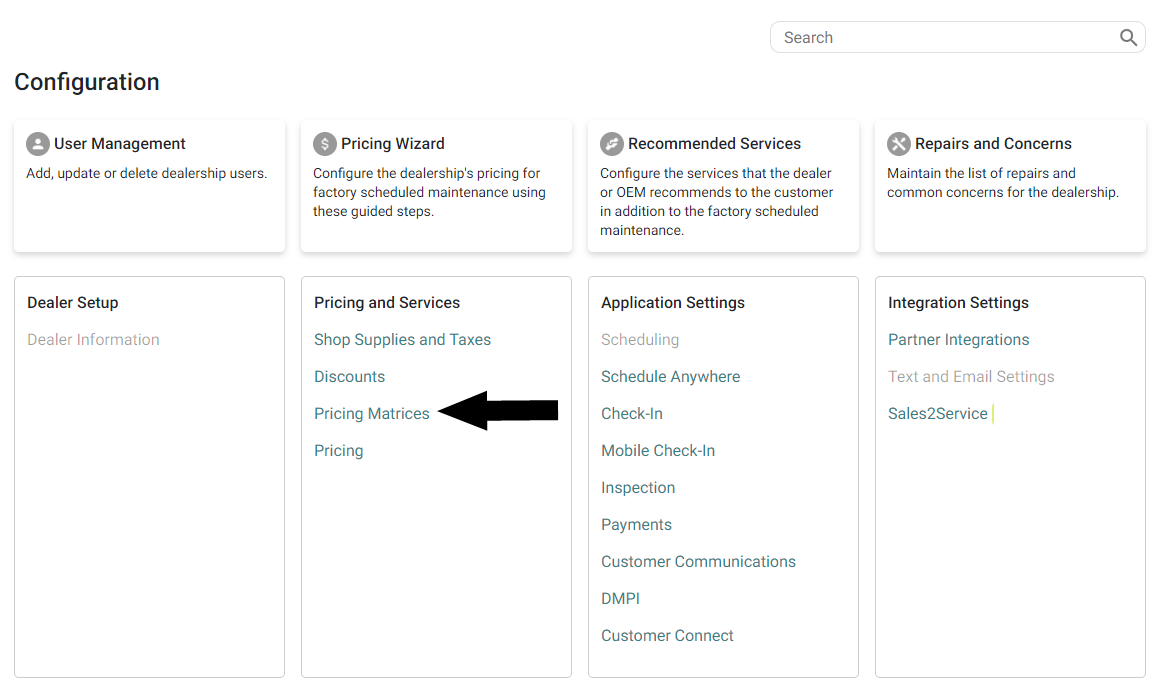
To setup the grid:
- Go to Labor and Parts Pricing Matrix Configuration
- Click
 in the 'Grid Pricing Configuration' area.
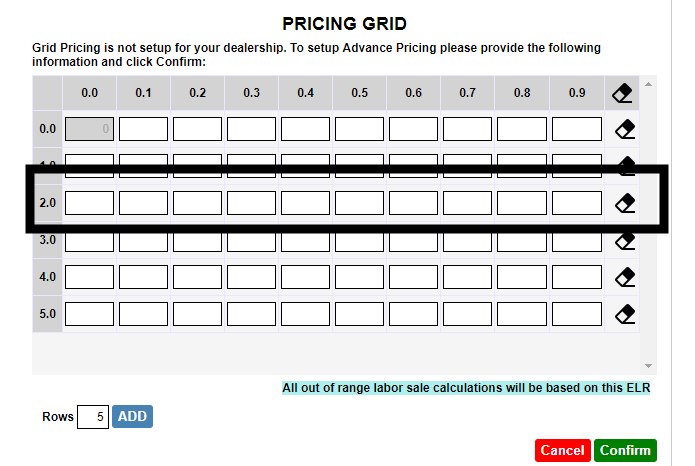
- The labor price grid appears with 5 rows by default.
- Each row represents a labor hour value.
- Each column represents labor hour increments of 0.1.
Note: For example, the row labeled '2.0' hours has columns representing 2.0, 2.1 and 2.2 hours up to 2.9 hours.

- Each cell represents the labor price for the indicated labor hour increment. Enter a labor price in each cell, in each row.
Note: In the example, the labor price for 0.2 labor hours has been set to $60.

- If cells are left blank at the end of a row and in subsequent rows, the effective labor rate (ELR) from the last cell is used.
Note: In the example, the labor prices for hours greater than 4.1 have been left blank. In this case, the labor price grid assumes an ELR of $450 / 4.1 hours = $109.75vfor all subsequent cells and rows.
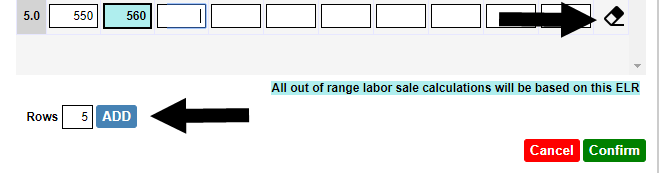
- Click
 to add more labor hour rows as needed.
 - Click
 to clear a row; Click
  at the top of the grid to clear all cells.
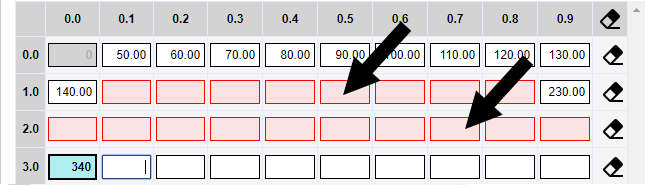
- Cells cannot be left blank between cells or between rows. Invalid cells appear in red.
- Click
 when the grid is complete. A confirmation message appears
  . The "Setup Grid" button changes to
  .
.

Once the labor price grid is ready, select which labor types should use it:
- In the Labor Matrix area, click "Edit" beside the labor type.

- Select (check) Grid Pricing to indicate that the labor price grid should be used.
- Click "Update" to save the change. The grid will be immediately available for use.

Note: In the example, the labor price grid will only be used for labor type 'CP'. Labor types 'W' and 'I' will use the indicated rates ($0 in this case.)